Thursday, May 11, 2017

Finally afloat :)

It's been a long wait... but now boat is in the water and in better shape that it has been in years. During one of our first trips, a passing boat chatted with us and wondered that Seanna must be new or almost new. Nope, not quite, 12 years and still kicking. Warms my heart to hear comments like that :)


We've been doing small jobs around the boat, still some stuff to do, well, there always is..
Changed the anti-slip on the stairs. New Vulcan 7 display outside needed to be changed. Thanks B&G for quick service and sending the replacement. North Sails Finland has been taking good care of our sails and most importantly thanks for all the jobs on the hull done by boat repair yard "Vela Venekorjaamo" in Turku, Finland.

Propably the best yacht/boat shop in Finland.

May 1. required some celebration and so we did.
Testing our new foul weather gear by Pelle Pettersson. Not the most obvious choice, but so far after some sailing in near freezing rain, swell, spray and so on I think they are at par with the benchmark MPX-gear. Superyellow Headwear has some really nice beanies for us this year as well.

Tomorrow we go again, somewhere for the weekend, No snow would be nice:)


Wednesday, August 17, 2016

High and Dry :(

Seanna is still up and will not make it into the water this season. It has been a real set back for us as this would have been our first full summer in our new home territory, Archipelago of Finland and Sweden.

A lot of repairs and improvements are being done. I will post about those once I get some good pics.


Tuesday, February 23, 2016

Mas Trabajo!

The hull is still waiting for the new Charcoal Metallic lines, sides are buffed and waxed.

New gadget added :) B&G Vulcan 7 installed next to the wheel by Aquamatic Oy, Turku. Works as a small plotter and additional display for data. The screen can be split many ways, for example 4 data boxes still have pretty large numbers that can be easily seen. Another nice feature is the possibility to control brightness of the mast displays etc. and ping the line, start timer, etc. from the wheel.

Bottom still waiting for that epoxy
Vulcan 7 installed, teaks need some TLC

Tuesday, February 16, 2016

Heating ducts insulated

Well, almost done. Will need few more pieces for both, 90mm and 75mm.

Maxitherm is very nice to work with. Just simply clip on, easy to trim/cut as well.

Saturday, February 13, 2016

Eberspacher D4 Installation

Past few days have been filled with drilling, sanding, trying to figure out a best route for the ducting and so on... Now all cabins have an outlet except for the aft toilet which proved to be a real cahllenge to get to. We will add a warm air outlet later on if necessary.

The Eberspacher D4 -Heater is sitting at the Aft. locker, ducting is led forward on the Portside under the bed, counters and sofas. Ducting is 90mm all the way to the Fwd. bulkhead, where it splits to two 75mm duct for Fwd. Cabin and toilet.  From the picture below, the "main duct" goes down and from the T-connection a 75mm duct goes over to the other side to an outlet for Stbd. Aft. Cabin.

Installation was pretty straightforward, holes needed for the ducting were 98mm and 84mm. Just needed to check and double check the positions with a small 2mm drill "pilot drill" before drilling the big hole..

Aft. Locker ducting 

Stbd. Aft Cabin. Outlet is higher up than normally for two reasons: limited space for ducting and optimal air flow for drying sails/gear etc. 
 
Port Aft. Cabin. Outlet in legroom, 75mm duct Tee'd off 90mm main duct.
 
Saloon outlet, 90mm "always open" outlet Tee'd off from the main duct. After testing the system we might add one more outlet to the main cabin if needed.
 
Main duct led under the bed in Port Aft. Cabin. The Aft. end was very tight and there was barely enough space for the duct. Hopefully the bends will not affect the flow too much. At the same time it is what it is as this is the only possible route for the duct. Rest of the duct is relatively staright all the way to the Fwd.
 
Under the saloon sofa, just aft. of the bulkhead the main 90mm duct splits to two 75mm duct for forward cabin and toilet.
 
Fwd. toilet/shower outlet. 

Fwd. cabin outlet with the toilet door open.
 

Easy Start Select -control panel above the Wireless VHF -Handset, left of the computer screen. External temperature sensor is mounted under the monitor where it should be away from the sun, draft, etc... 

Ducting is now done. Still need to figure out inlet for heated air, combustion air and exhaust. Also the ducting will be insulated with Maxitherm where it is close to the hull and not near spaces that need heating..


Tuesday, January 26, 2016

Sailing Beanies

For sailors - by sailors. Mainsail of S/Y Seanna acted as a model for this beanie by Superyellow Headwear.

www.superyellow.fi

Saturday, December 26, 2015

Planned works for the winter...

Quite a lot of works planned for the boat during the winter, here's some of them listed... Hopefully we are able to get everything done before we splash the boat again

1.
Electronics: Install B&G Vulcan 7 chartplotter. Flush-mounted to the angled part of the deck behind Stbd. primary winch. At first the idea was to have one display on both sides of the wheel but just one should do well as the main purpose for this display is to have something to help with navigation when shorthanded in archipelago/shallow water. When the chartplotter is not needed it can be used to track windshifts, performance data, etc... The main Nav. station is still downstairs. 

Also need to install a Mastervolt inverter, Plan is to get only a small one, 300/500W, mainly used to power up the new computer screen and occasional charging of things. 


2.
Change the color of the decorative stripes and name/logo to "Gloss Charcoal Metallic". Also the previously painted bootstripe will be wrapped.


Old vinyls are removed and new ones are going on. The Charcoal Metallic Grey should play well in the daylight with little glitter without being too "goldy". Idea was to change the color to give more contemporary look and distinguish the boat from others. Old vinyls were not in a really bad shape but were peeling off here and there. This job was planned and 1/2 paid for to be done in Valencia. The English guy who was supposed to do the could not complete the job and walked away with my money..

3.
Fair the bottom & foils, re-coat and get the finish to look like the bulb on the picture below. Paints arrived from UK just before Christmas, I am hoping to get this job started by the end of January, but it really depends on the painter and his (and his shops) availability. It would be nice to do the bottom of the keel as well but I do not know if it is possible? 


4.
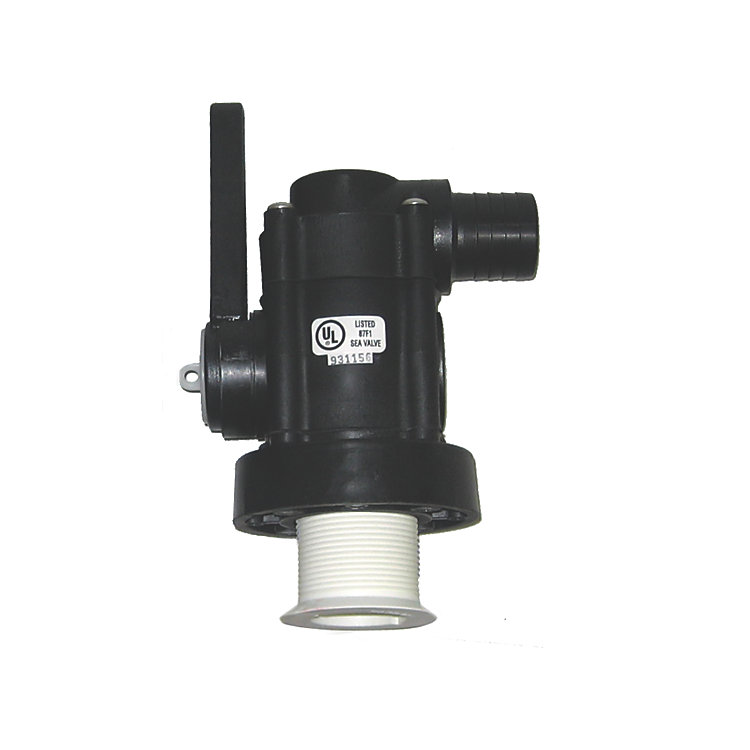
Upgrade the seacocks to a flush type for optimal light wind performance. Marelon Flowtech - closing flush valves would have been nice but there is not enough clearance for the valves. 

4.
Eberspacher or Webasto heating. GS 45 has limited option for ducting and it is pretty tigh fit but hopefully we can get a nozzle to every cabin. We might leave the Aft toilet without a warm air -nozzle, the Fwd. toilet/shower is more important as it is used for drying gear. Haven't yet decided on which model to go with but it all point towards Eberspacher D4 or D4+. Reason is the wide power range, especially in the lower end of the scale.

5.
Uprade the Solimar 170cm. S/S wheel to a composite wheel. Also at least the lower rudder bearing needs to be changed, top one we'll have to inspect when the rudder is dropped. Plan is to make an slight upgrade to the system as well. 


Saturday, December 19, 2015

Christmas at Gulf of Mexico

The boat is in a warm warehouse, crew is out working to get the means for yet another adventure in the future :)

Crew T-shirt v1.0 in test.

Happy holidays!

Tuesday, December 1, 2015

Jobs contn'd

Prop Painted for Mediterranean in 04/2015. Unpainted prop on the Mediterranean would foul like there's no tomorrow. In the Baltic Sea it is not common to paint the prop as there is much less growth...

Paint removed and almost done with the polishing. It was a PITA to get all the paint off. Prop had some corrosion hiding under the paint, not too bad though, for a 10 year old prop.
Started the winch maintenance, used lamp oil+brush for the cleaning. 3/6 done. The smallest, 46.2 were easy to do, 48.2's were bit more complicated, but with help from the exploded view -drawing it was easy to put them back together. The 60.2's should be bit more complicated but as said, just need to follow the drawings...
Winches were in relatively good shape, I though they had almost no friction before the cleaning. I was wrong. The cleaned and newly greased/oiled winch was considerably more light to turn. They had a tad too much grease on them, now I only applied a very thin film of Harken Winch Grease with a small paint brush and Harken Pawl Oil to the Pawls.